The photo ornaments
I mean, it was gonna happen
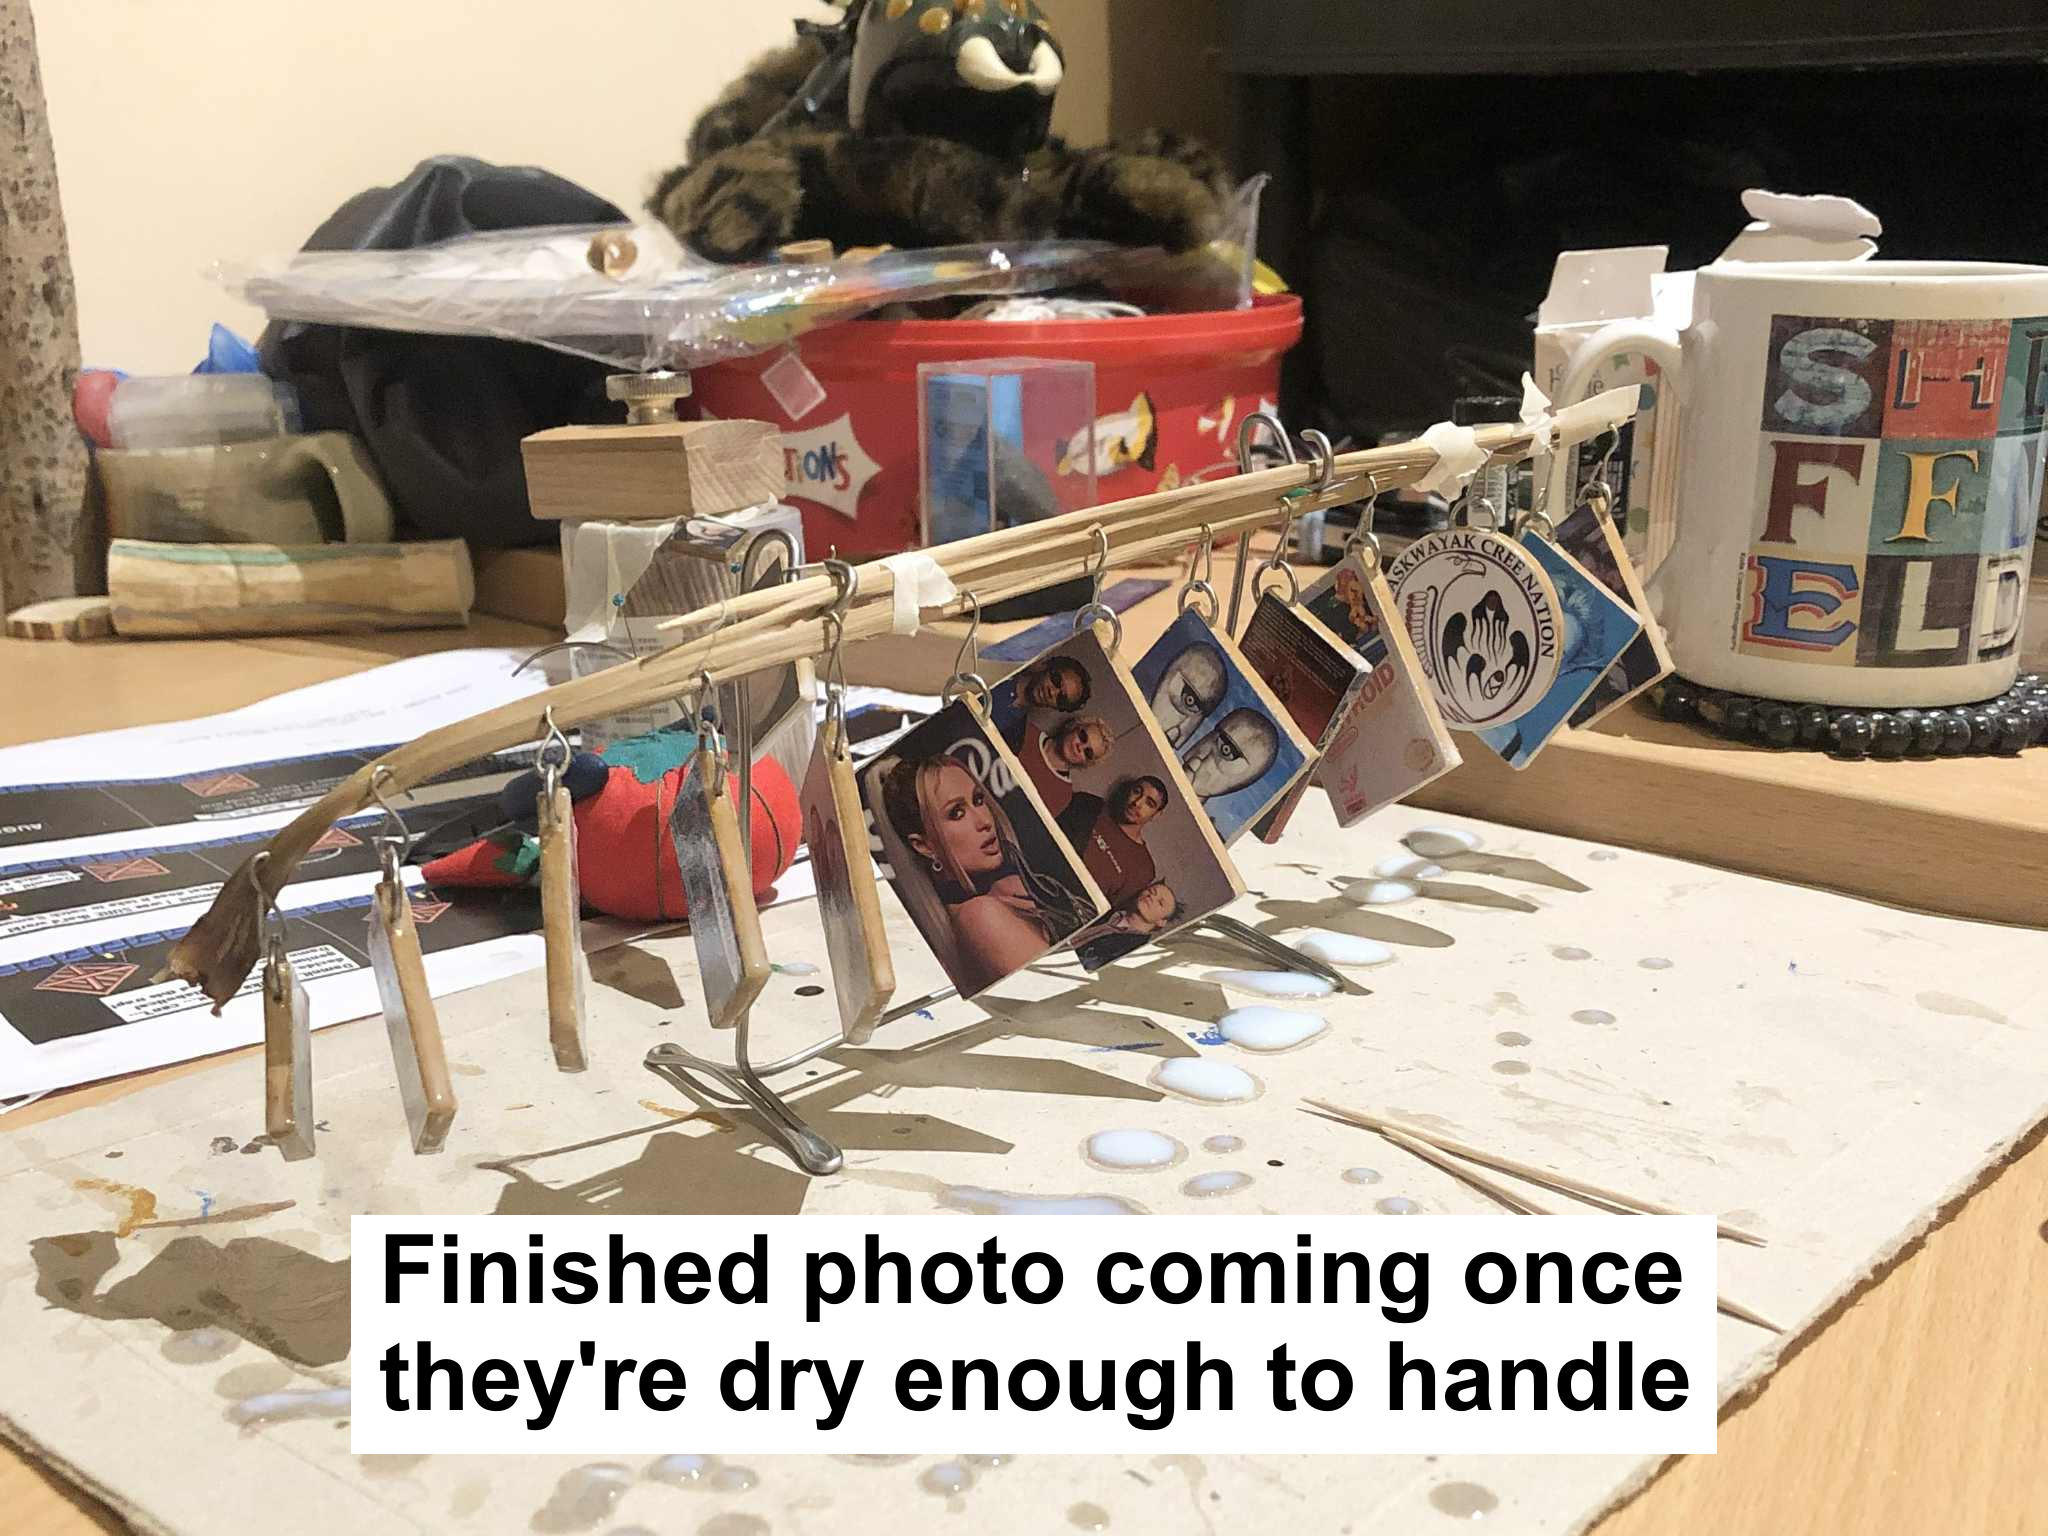
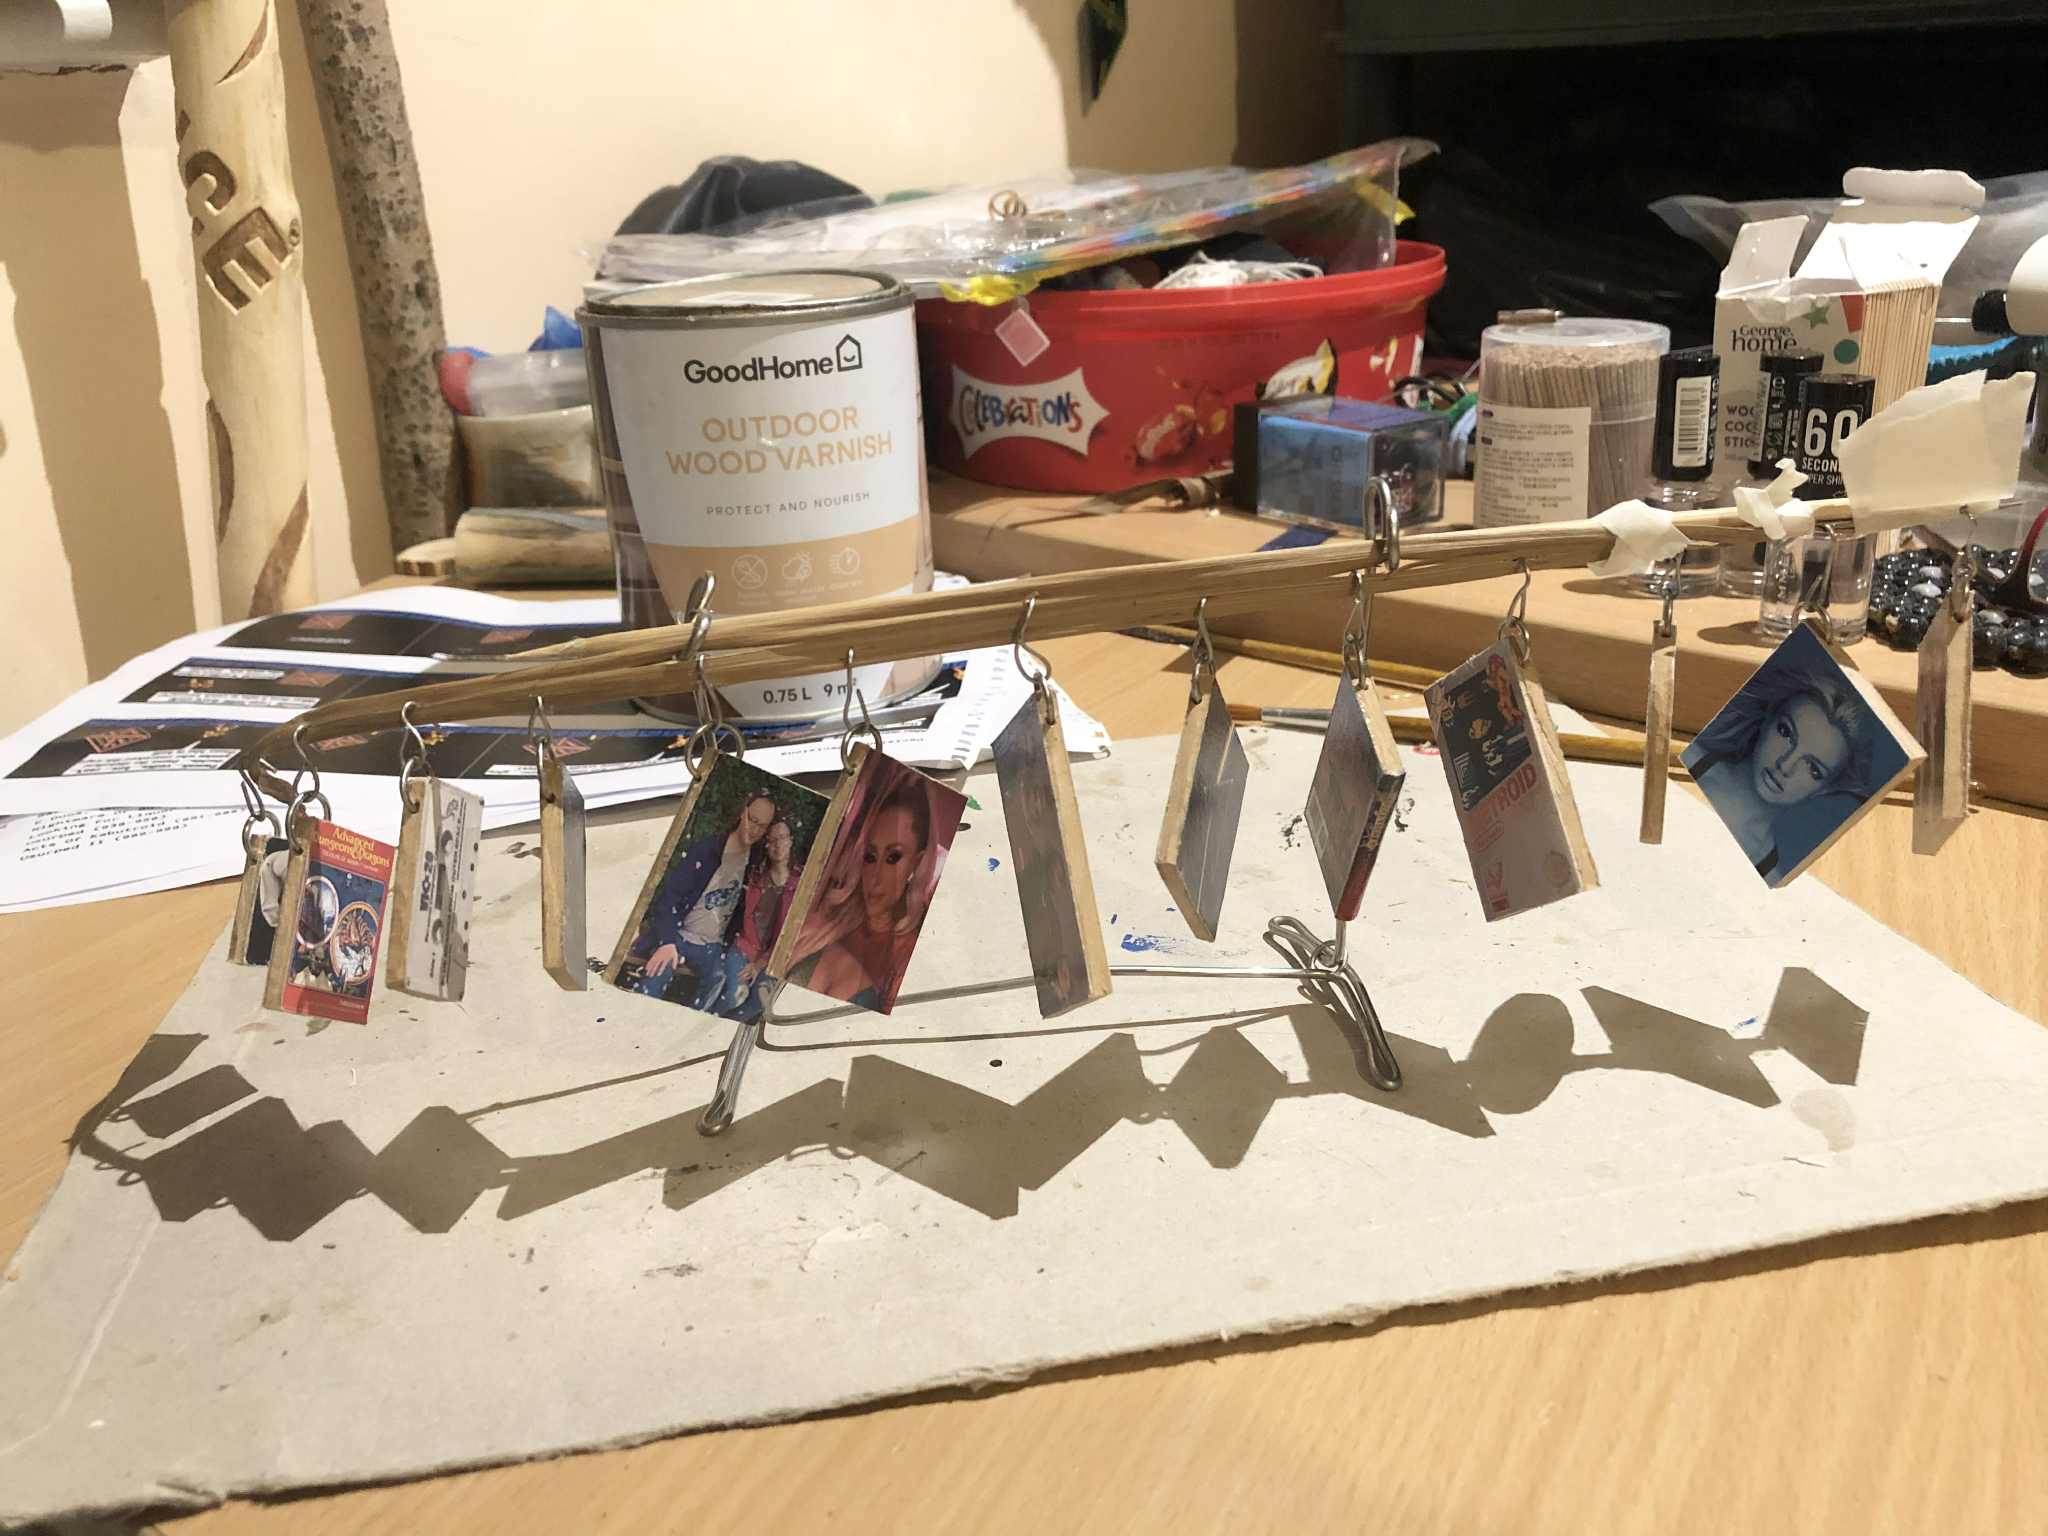
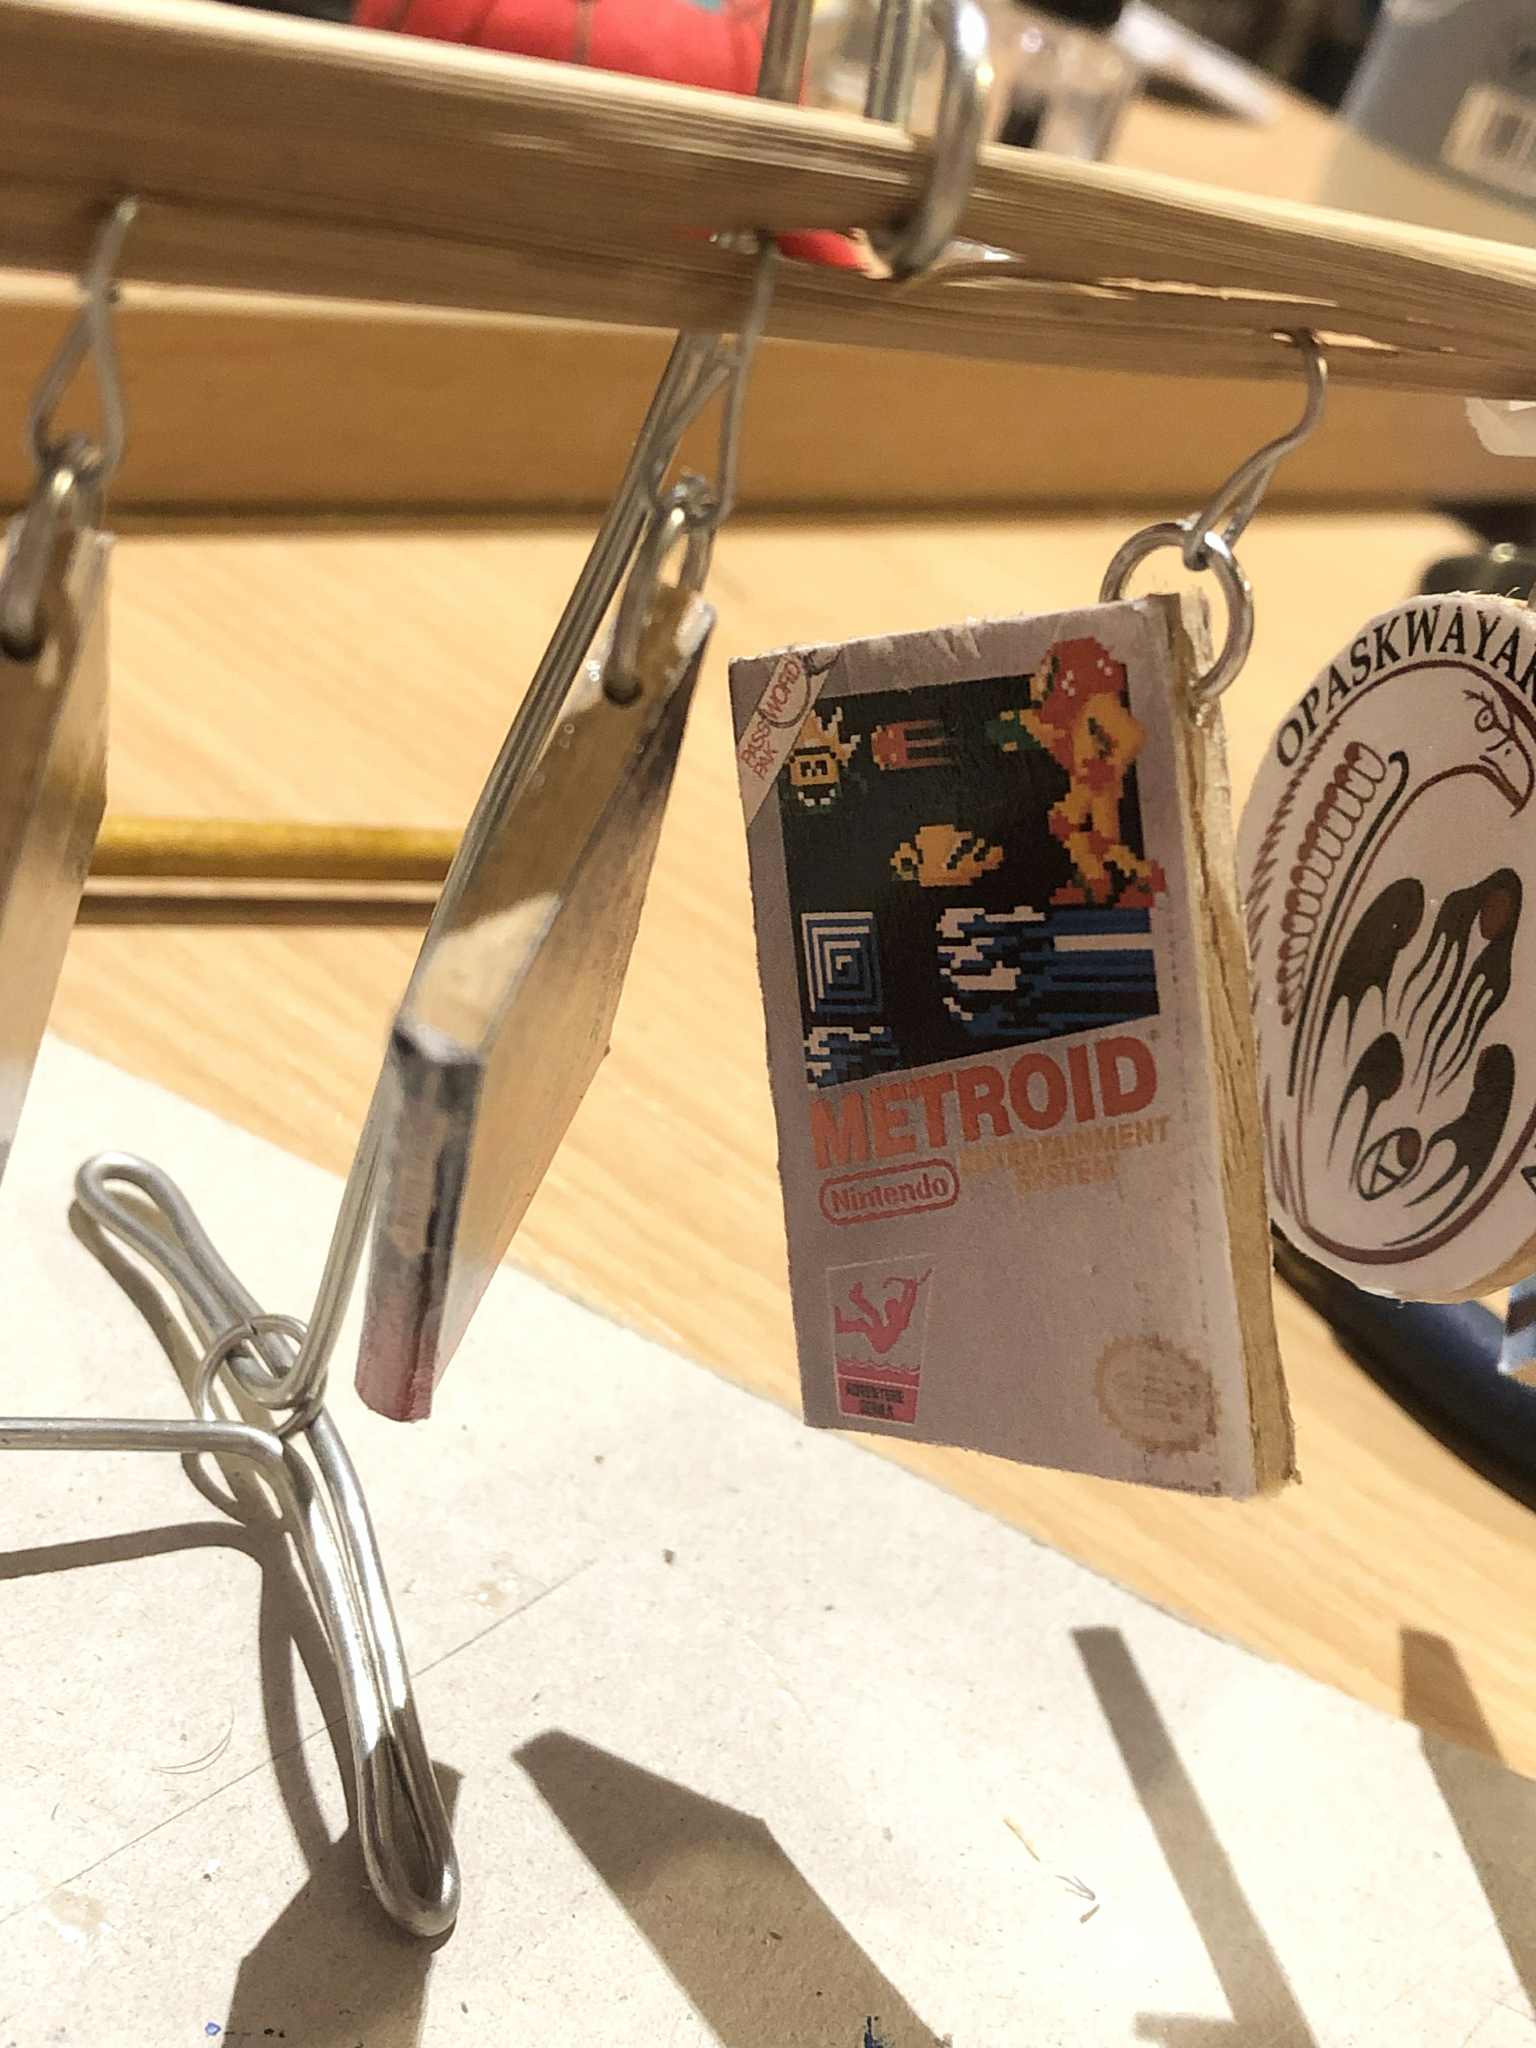
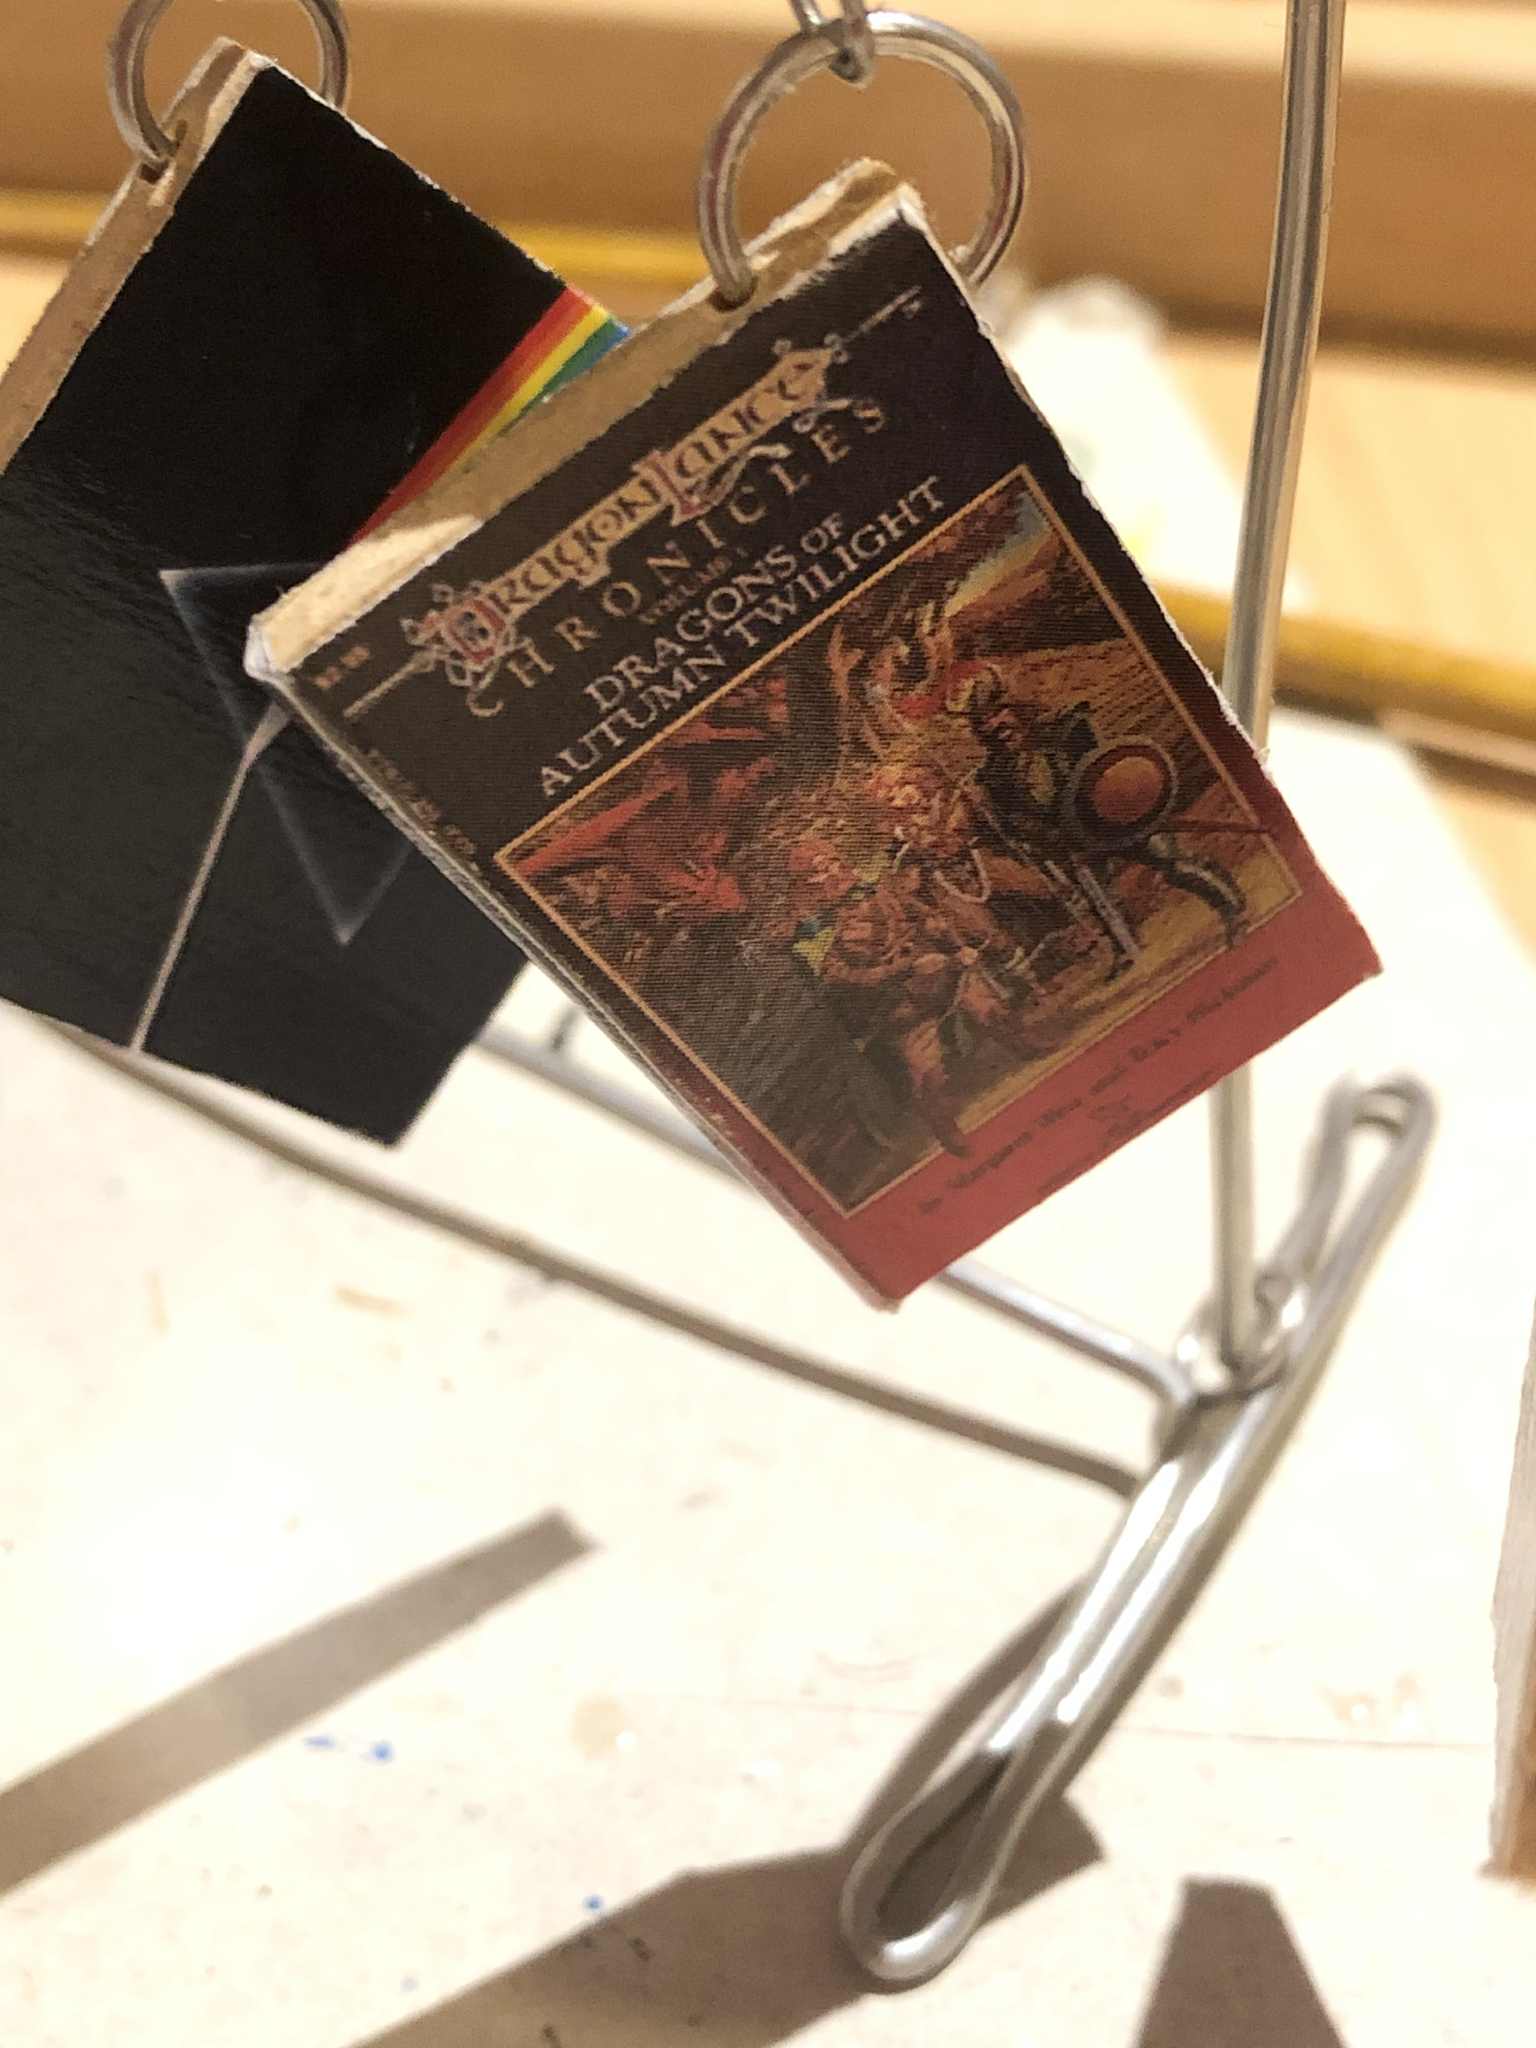
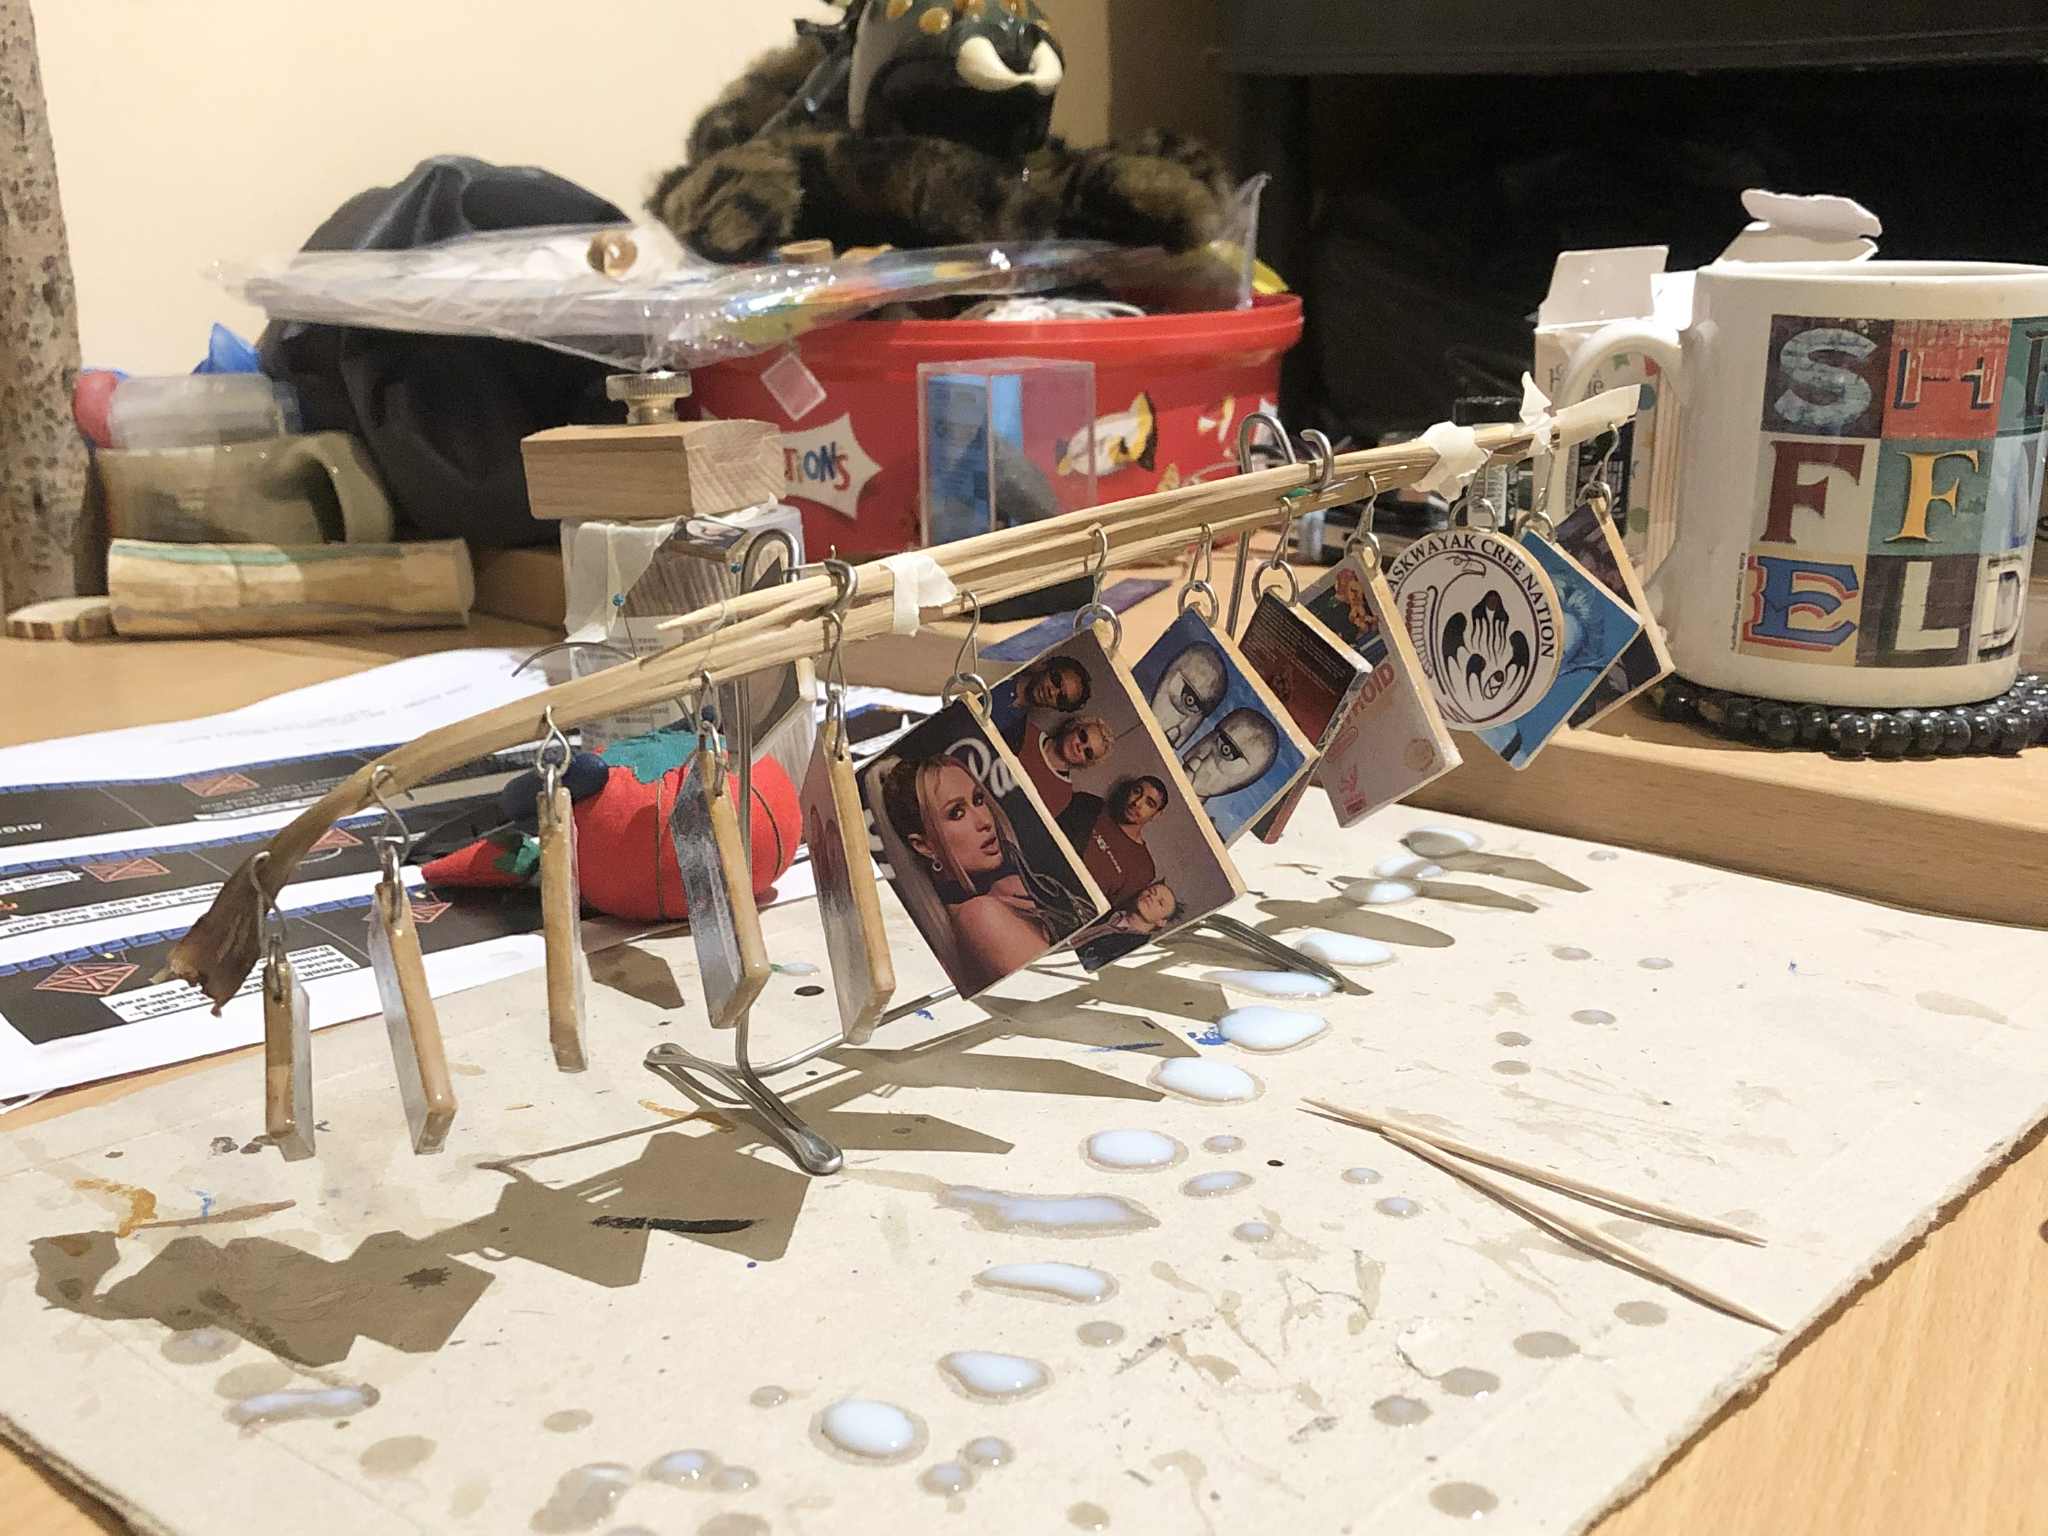
So, it started vaguely with my thought "Y'know... I have that one version of the Photo of a Woman of the Hofer Family, I could keep moving that from the wall to the tree and back... but that's a kinda nuisance. I should make maybe one more for the tree exclusively. But y'know... why stop there?" And so was born the idea of "ok, let's find a whole pile of photos that we'd want to turn into ornaments." We started with our idols and favourite bands, Britney Spears, Paris Hilton, Pink Floyd, The Prodigy, and expanded from there. I should have one of our parents that have passed, one for just us ourselves, a NES Metroid box, eh, let's get some more like that, the Dungeons & Dragons: Treasure of Tarmin box, that Hofer painting of course, we've already got extra print sizes to use for that, let's take a picture of that that Vic 20 cassette for Blue Meanies from Outer Space, my favourite game on there (and find a screenshot from the game for the other side), Planet Zebeth, you've gotta be in there, Opaskwayak Cree Nation, my second childhood hometown, aaaand since I've begun to love the series so much, the first printing of the first Dragonlance book, Dragons of Autumn Twilight, for which we even found and printed the spine of the book too. I figured if I made a whole pile of these at the same time it would go fairly quickly, and it did! The longest part was cutting all of the hardboard to size, taking like... 5 hours. We first took all of the photo printouts, put a sheet of doublesided tape on the back, cut them all out, and arranged them as tight as we could on the hardboard (with a few millimeters between them, give me some slack to work with). We boxcuttered all of those out, trimmed them all to size (I made sure to make the opposite side the same size as the front, of course), and carefully placed all of the other sides on their respective ornaments. With all of that done, we took our lessons from the miniature Hofer painting, and coated them all in a few layers of gloss outdoor varnish to seal in the paper, covered the edges of all of the hardboard (minus that one binding side of the Dragonlance book) in PVA wood glue, and then, to give them all a nice, gloss coat (something I didn't do on the very first Hofer painting wall ornament, because I liked the painting-looking texture that left, but these would need a little more durability to bounce around inside the ornaments box, also glossy for the Christmas tree), I dipped them all into the varnish can for a thick, smooth coat, and hung them back up to dry and drip, collecting the accumulation of varnish off the lower hanging corner with a toothpick after leaving them for a few minutes. At that point, they were, for all intents and purposes, finished. They just need to hang-dry for like... several weeks, is my usual wont, to make sure they're absolutely rock-hard solid dry. But in general, after being hung to longdry, they were complete, and on the tree for Christmas :D Finished December 9, 2025  |